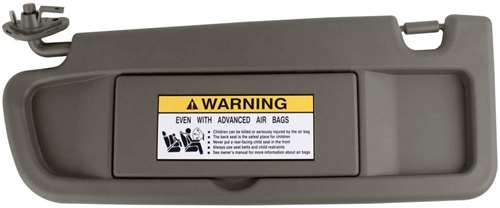
How to Block Sun while Driving? An inexpensive solution to avoid glares! A sun visor for cars is a smart component located just above the windshield. It is designed with a hinged flip that is supported by an adjustable feature. It is to keep the harmful glare of the sun from restricting the driver’s view.
Common Problems of Sun Visor
Before jumping on ways to fix a sun visor, you must know how it’s initially made to effectively understand the problem. A sun visor used to be very basic in its structure.
It is composed of a single scrap of fiberboard, covered with either vinyl or clothing, and attached to the hinge on the windshield’s upper side. This component’s basic purpose is to keep the sunlight from blocking the view.
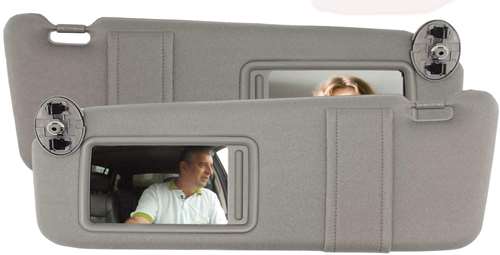
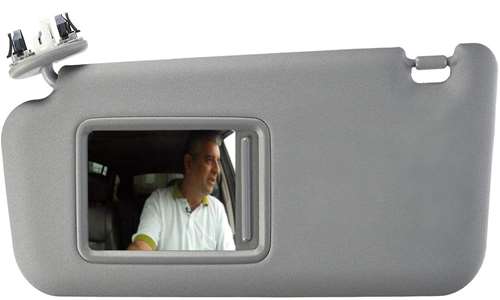
Most sun visors come with prefixed mirrors, but many modernly equipped sun visors now include a mirror that automatically lights up. When we talk about sun visor, there are many complaints regarding it!
But the most common problems are regarding loosening/ tightening of sun visor or broken hinge or clip. Throughout this article, we will get to know how to get rid of such problems.
How to Fix a Loose Sun Visor?
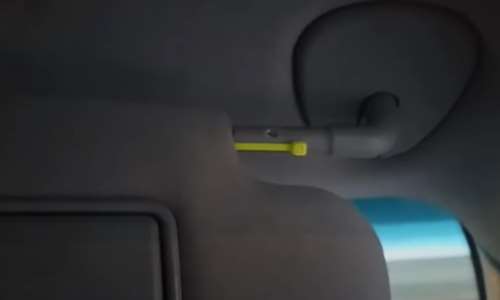
Before you start working on ways to fix a sun visor that won’t stay up in a car, you must know the core reason for this problem. It usually occurs due to the lost friction among parts that hold a visor intact.
To put it even more simply, when there is no more friction between the arm and the sun visor, it results in a loose sun visor that would not stay up. Imagine driving midway on the road, and out of nowhere and a sun visor drops in.
To avoid all such nuisances, a simple and quick remedy is to tighten all screws of the sun visor for a tidy and instant way out. What if it still doesn’t work out? There are still many possibilities, which can work differently.
Try using zip ties or PVC tapes on the sun visor arm to build its intactness. How about a rubber stripe? You can also use rubber stripping on the adjacent clip to better grip the car sun visor.
Nothing has worked for you till now? You do not need to worry about it. Some other ways to fix a loose sun visor are mentioned ahead. Let’s move through some other convenient hacks, and you never know which may work out for you.
How to Fix Sun Visor with Velcro?
Recover sun visor to its fluent functioning can get fairly simpler if you have access to simpler tools.
Velcro might not sound like a tool to help you in this regard, but it’s a very convenient and cheap method for instant results. Buy it from Amazon now.
Materials you will be needed include a simple Velcro tape and a screwdriver (If needed to remove the sun visor). You need to wrap the tape around the arm and insert it into the visor to bring it back to function.
Start with moving the visor away from its arm. You can use a screwdriver to serve the purpose if it’s not moving at all. Once done, take approximately an inch long piece of Velcro tape. Just right at the transition point, where the arm starts to get thinner, place Velcro tap over there.
After you get satisfied with the placement, shove the visor back into its place, and it’s done! Check by moving it all the way down and clicking it back to its position. All you need is a Velcro, and it takes a while to fix the loose sun visor.
How to Fix by using Nuts and Bolts?
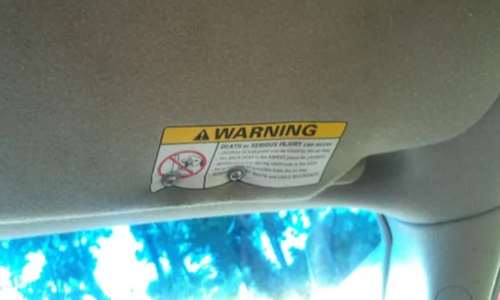
If you are a handyman, it is more convenient for you to work with this repair hack. Instead of spending bucks on getting a new sun visor, this will definitely be a cost-effective hack.
Before you start instilling deeper, all required equipment is very easy to access: A common Hand drill, 2 Bolts, 2 pieces of Locking washers, 4 flat washers, 2 Nuts. That’s all you require to begin with the procedure.
While you start fixing, make sure to go with a languid and steady pace so that you don’t end up ripping the visor. By a distance of 2 inches from an anchor that connects the visor to the roof and ½ inch from the top, mark two points up and down to the arm on the visor.
Drill holes at marked points using a simple hand drill and place a flat washer right over the hole. Now start shoving the bolt such that it passes through both: washer and the hole. On the contrasting side, place another flat washer, which maintains equal pressure throughout the visor.
To get a grip twice more than the original hold, secure the flat washer by placing a locking washer over it, which can keep the core nut in place. Hence, fewer chances of relapsing.
Lastly, finish the process by placing the nut over the locking washer. Tighten the nut to the extent such that the sun visor no longer appears to move freely.
Using a Visor Riser Gadget
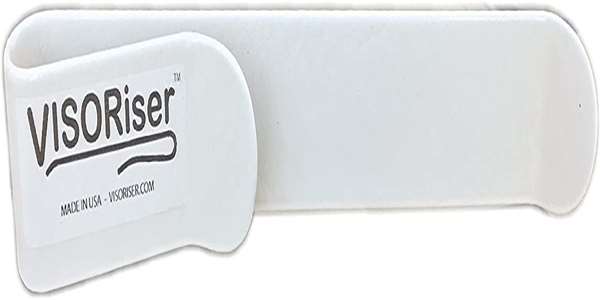
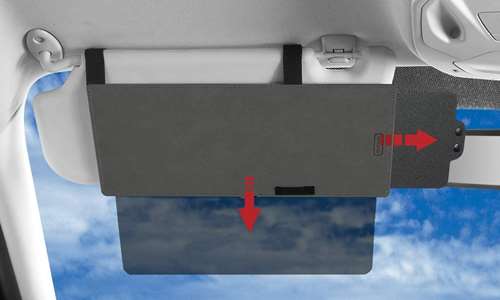
A visoriser gadget is a smart tool indeed! With fluent handling and a user-friendly approach, this has become an inexpensive yet fits-all type of sun visor. See the latest price here.
The method for using a sun visor is extremely straight forward, with zero complexities involved. To know how to fix your sun visor with it, read the instructions given below:
The process of the installation starts with flipping the visor up, placing the gadget along its surface. Ensure the bent end of the gadget faces you, with the other end extending towards the other end of the visor.
Place your finger at a point over the gadget where the visor ends. Remove riser gadget from car visor. The next step is to flip the gadget by keeping the finger at the same selected point. At this selected point, give a slight bend to the gadget and flip it back to the prior position. Finally, insert the visor riser gadget over your car sun visor, and it’s fixed with a quick!
How to Fix a Floppy Sun Visor?
Remember, earlier we mentioned trying zip ties to fix a floppy sun visor? Now, here’s an elaborated explanation for how to make it work for your floppy sun visor.
Nothing annoys a driver more than a hanging sun visor, which is authentically supposed to stick to its place. All you need are two small-sized zip ties and a screwdriver just in case required.
You have to start with pulling the visor away from its arm, such that it leaves a sufficient amount of vacant arm behind. Place one zip tie parallel to the sun visor arm and try pushing it in a direction so that it goes inside the visor.
Shove the visor back to its place and observe if a zip tie has become successful in generating friction or not. If it seems to require a little bit more friction, repeat all the preceding steps.
How to Fix a Broken Sun Visor Clip?
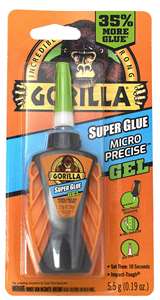
Are you worried about breaking the sun visor clip while you’re tried to put it back? You can get a quick fix to your broken sun visor clip, superglue, and the broken piece is everything you need to fix the damage.
Clean the surfaces and apply a thin layer of glue on the broken part and clip. Meanwhile, precisely examine where to place the broken part as a one-time focus can always save you from a really nasty fix to your clip.
Fix the broken part to the clip and hold for a second until it dries out. For a more firm and durable fix, apply an additional layer of glue on outside cracks so it doesn’t break twice.
Do you not have super glue available at hand right now? Straight away, get yours from Amazon.
If the fragmented clip is not much worse, super glue can do work. But most of the time, fixing a broken clip does not seem like a trivial task. So before you end up getting exhausted with no apparent results, a sun visor clip replacement can be your savior.
How to Remove Sun Visor Clip?
As some screws attach to a sun visor retainer clip, removing it would not be a great hassle. You need a screwdriver to unwind the screws. Put the replacement in place.
Coil back screws to their place and get ready to enjoy a new clip despite withstanding a broken one.
Are you experiencing a broken sun visor arm? Well, unfortunately, there is no antidote for it. Car sun visor replacement stands back as the only possible solution.
Recommendation for Best Sun Visor
In case you are looking for a durable and best sun visor for car, we have a recommendation you can rely on:
SAILEAD Polarized Sun Visor Extender
Not only universal in its usage, but this SAILEAD sun visor also have an inbuilt polarized technology which provides a unified direction to reflected waves, hence ultimately allows a comfortable vision to the driver.
It’s “easy to install” feature makes it an impeccable choice for any car you own. The exceptional features don’t end here, but instead, it includes an additional layer of polycarbonate, making this sun visor twice more resistant and durable than any other sun visor. See the latest price here.
Sun Visor Repair Kit
You might find many sun visor repair kits but let me tell you that those are just another trick to make you spend bucks of money over them. Since each car comes with its dimensions and design of sun visor that you cannot alter, therefore, there is no such universal sun visor repair kit.
Common Models of Cars and Fixture
How to fix sun visor Toyota Camry / Toyota RAV4?
Before you start fixing, make sure your car must be at a suitable place. Detach the sun visor from its extended arm and keep that aside. Now, gently insert a flat screwdriver under the hinge (a part connected to the roof) and turn it slightly to pull out the cover.
The removal of the cover is likely to expose you to two metal clips. Now pull the hinge out. Once done, you can see the metal clips more clearly. At this stage, you need to remember the exact place for each clip. Remove these clips and then put them back in the exact place.
Slit the clothing of the visor to put the swing arm anchor back to its place. To make sure, it remains stick to its place. Add a strip of Aluminum over it. Secure the strip by drilling holes and binding it with screws. Add stitches to the clothing. Put the hinge back to its place, and you are ready to enjoy a functional sun visor yet again.
But what if your visor has some other problem? Well, replacement is still a smart choice to go for.
- Toyota Camry sun visor
SAILEAD Sun Visor Compatible with 2007 2008 2009 2010 2011 Toyota Camry and Camry Hybird Without Sunroof and Light. See the latest price here.
- Toyota RAV4 Sun Visor
SAILEAD Sun Visor Compatible with Toyota RAV4 with Sunroof and Light. See the latest price here.
How to Fix Honda Civic Broken Sun Visor?
Fixing a broken sun visor is not a smart choice to make. Fixing a broken sun visor can cost you a significant amount of money but in exchange for what? A fixed sun visor alone!
You would never want this for yourself; therefore, a honda civic sun visor replacement is likely to help you in the long run. See the latest price here.
Firstly, you need to remove the existing broken sun visor. For this, you need to slightly put a screwdriver under the hinge and give it a push. Remove the upheld plastic. Now, remove the screws. Go slowly, so you don’t end up further damaging the car, and remove the visor. Now, it’s time for a replacement.
Before you add a replacement, make sure to purchase one, which matches your vehicle. Put the new sun visor in the exact place as the previous one, and tighten up the screws to hold it in place. Make sure the screws are tight enough so the visor doesn’t slump down while you drive.


