Motorhomes are a type of recreational vehicle that allows you to camp anywhere. To put it simply, it home on the wheels.
It can be parked in a camping area or out in the wild, carrying the accommodation of conveniences alongside you.
However, since you can go anyplace, you may wind up on not precisely even ground. When that circumstance emerges, it’s fundamental to understand how to even out a motorhome.
As these vehicles are meant more for parking than driving, they require proper leveling.
Why is Leveling Important?
Leveling a motorhome ensures that it remains stable and does not rock back and forth. Not only does it ensure stability, but it also keeps a lot of appliances in the vehicle from malfunctioning.
Appliances like refrigerators have gas circulating in them that generates the cooling; if it tilts more than 3 degrees, it can cause some severe damage to it.
A tilted motorhome causes damages to the amenities and discomfort as you can’t walk inside sway-free.
When I was in elementary school and camping in the west with my dad, I fell from the bed in the middle of the night because the RV was not leveled properly.
Why Does an RV Need to Be Leveled?
If an RV is parked on an uneven surface for a long time without being level, it may considerably damage the structure of the frame and destroy the chassis.
This damage occurs due to uneven distribution of weight, causing more on the rear-end, leading to severe damage to the chassis and other components of the frame.
The uneven distribution of weight also causes extra stress on the frames of the windows and the doors. It results in more strain on the edge. Therefore, to avoid this kind of problem, leveling is essential.
Now that you are clear on its importance, do you want to learn how to level different motorhomes correctly?
How to Level a Motorhome (Class A, Class C)?
To level class A and class C of motorhomes, you first need to find solid ground with a type of soil that will prevent the ramps from sinking in or sliding. The type of the ground is your primary concern here as it will support your vehicle.
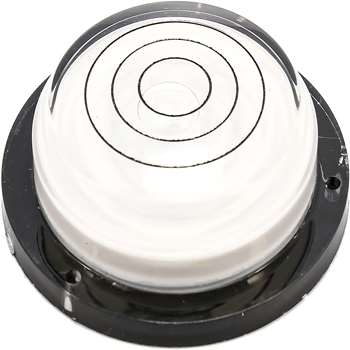
Next up, look for a suitable parking spot and use a bubble level to check which part of the motorhomes you need to lift. See the latest price of Camco bubble level for RV.
For this, place the lever on the floor, countertops, and table in the home section. For a more accurate result, do this close to the center of your motorhome.
The measurement process needs to be thorough to find the portions that require lifting; therefore, go from to the back and then from left to right.
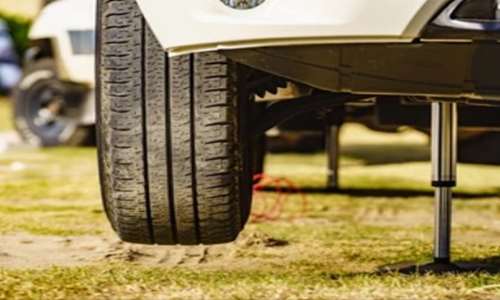
Once you have correctly measured, use an electric jack or leveling blocks to level your motorhome, similar to jacks and ramps.
Precautionary Measures
Safety should be your priority while working with any vehicle. Hence, here’s a technique and some tips to ensure your leveling procedure goes safely and smoothly with zero hassle or mishaps.
Firstly, before getting into the procedure, make sure that the wheels of your motorhome, especially the front ones, are straight. If they aren’t, there is a high chance of getting the bodywork damaged
Now another slides outs. I know what you’re thinking; should I let them out or keep them in? The answer is, it depends on your RV’s manufacturer. Do as they recommend and do it at the start.
Get this: if you do not have chocks to prevent the vehicle from moving, in such a case, always start lifting from left or right. Going horizontally will help you in avoiding the car from rolling while you are lifting it.
As mentioned earlier, the type of ground you are parking on is essential. So, if it is soft or uneven, use jack pads to avoid the hassle.
Another method that you can use for lifting and leveling your motorhome is by using the RV Levelers.
RV Levelers Method
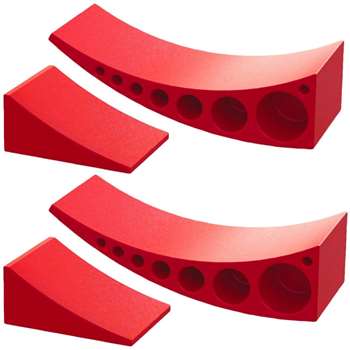
RV levelers have to be one of the most straightforward equipment out there for leveling motorhomes. These comprise two components, a drive-on, and a wheel chock.
Place the wheel chock behind the wheel to keep it sturdy in its place and move on the drive-on. Andersen Camper produces one of the best RV levelers.
With a robust design, their versatile design has a width of half an inch, all the way to 4 inches. Start lifting from the driver’s side and experience zero hassle. The best feature is that it takes less than 5 minutes. See the latest Price here.
Best Leveling System for Class C Motorhome

Have you ever found yourself in a motorhome-leveling situation where you have to lift your motor home but do not have built-in jacks? Wouldn’t it be great if you had another way of doing it? Let’s get into it.
First, you need to install a vehicle leveling system in your motorhome. If you are unable to find a reliable one, you can opt for the LogicBlue Technology LevelMatePRO+.
It provides complete control over the battery span, and you can control it using an apple watch or your smartphone.
One of the best features of LevelMatePRO+ is that is it has three times more battery life than the previous version with Micro USB ports inclusive.
Now on how to use it for leveling. Once you have installed and calibrated the leveling system, get your bubble lever out and place it on countertops and tables inside your motorhome to see which side requires leveling.
Now get your levelers or jack pads out and place them in front of your wheels. Move your RV back and forth on the jack pads and adjust the level accordingly.
LeverlMatePro+ will help you identify the exact points that require leveling and how much you need to lift them, making the procedure super easy.
Bonus Tips
Never rely on the dimensions of jack pads mentioned on the packaging and measure them yourself for more accurate results, as wear and tear of the externalities can make a difference.
Hydraulic Leveling Jacks for Class A Motorhomes
Hydraulic leveling jacks for class A motorhomes are installed permanently under the RV and controlled by electric motors. These are also called electric leveling jacks. Read the latest buying guide to find the best electric jacks RV.


